Cave and Mine Exploration Equipment: What to Buy and When to Buy It
Exploring caves and mines is a thrilling and rewarding experience, but it also requires a significant amount of equipment to ensure safety and enjoyment. However, if you're new to the sport, you don't need to buy all the gear at once. Our beginner's guide to buying caving and mine exploration equipment will help steer you in the right direction. Not only will it provide a comprehensive list of necessary equipment, but it will also suggest a recommended order of acquisition. By following this approach, you can spread out your costs and build your setup as your experience and skills improve.
This article contains affilaite links. If you make a purchase via any of the links in this page, we may earn a small commission at no extra cost to yourself. Thank you.
This blog will be in three parts. Part 1 is for beginners who are just dipping their toe into the world of underground exploration. Warning: this sport is addictive. You may want to get out now, while you still can! In part II, we'll look at what novice cavers will be looking to purchase next as their experience and level of ambition increase. And then there will be an additional part about accessories every caver or mine explorer needs!
The Bad News: Caving and Mine Exploration Can Require an Awful Lot of Kit
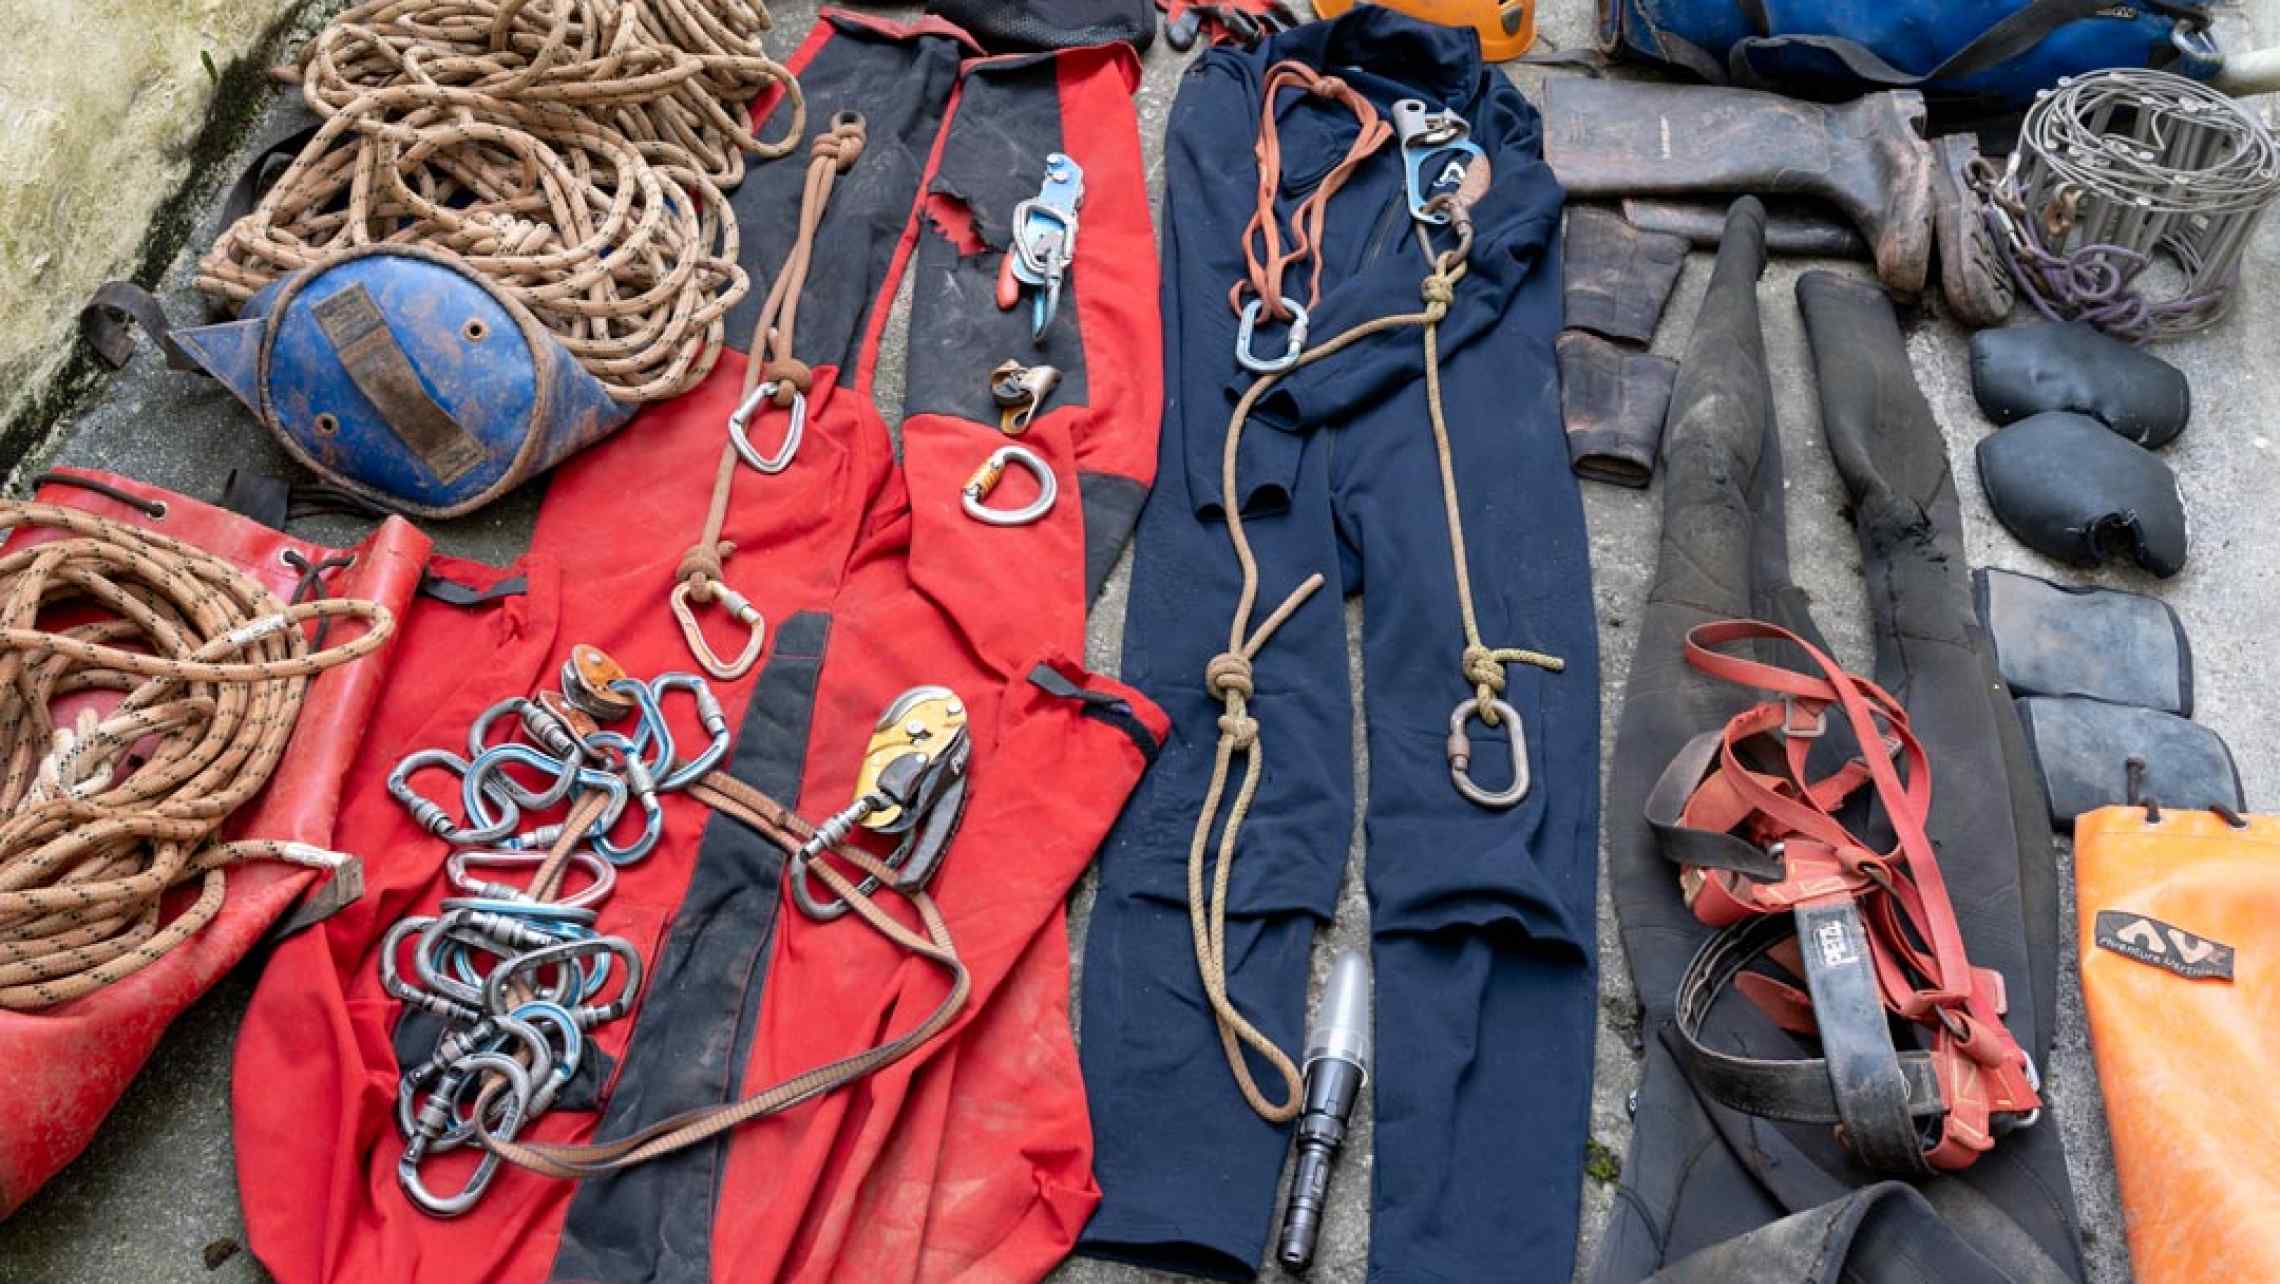
It's undeniable that the amount of gear we use for underground exploration is overwhelming. As I write this article and think about all the equipment we use, it's bordering on the ridiculous. If you're new to subterranean exploration, you may feel overwhelmed by the amount of gear you think you'll need, and the potential costs may make your eyes water.
The Good News: You Don’t Have to Buy all of Your Caving Kit at Once
But there is good news! It is not necessary, and indeed, it is not advisable to go out and buy an exhaustive suite of equipment to be able to begin to immerse yourself in cave and mine exploration. In this guide we’ll advise you not only on some equipment choices, but importantly when to buy particular pieces of equipment.
It can never be said too often that underground exploration, like any adventurous activity, carries with it its own set of risks. Therefore, as you embark on this incredible hobby, please bear that in mind. Only tackle exploration objectives that match your level of experience and, especially early on in your journey, seek advice and leadership from others.
If you’re new to caving and mine exploration, don’t worry! There are plenty of clubs and groups you can reach out to who will be more than happy to get you started. If you’re in the UK, go to the British Caving Association’s website where you can search for clubs in your region. And don’t forget to read every last word of the New to Caving website.

Make sure to read to the end of the article to find out about the essential safety kit you should always take underground.
Build Your Caving and Mine Exploration Gear List on Strong Foundations!
Getting started in exploring caves and mines can be done with surprisingly little equipment, and I’d say that you could boil the absolute fundamentals of underground exploration down to just two items. You’ll need these two items for pretty much every underground trip you ever undertake no matter what level. So whether you’re just walking into a short dead-end coastal adit in a Cornish mine, or whether you’re pushing into the deepest cave known to man, you’re going to need these things. They are:
You Can’t Explore Underground Without a Head Torch and Helmet
Or you certainly shouldn't explore underground without a head torch and helmet. Unless you’re content to explore in the style of an old Cornish miner, with just a candle on your hardened leather cap, you’re going to want, firstly, a decent head-torch.
Head Torch
Exploring the underground environment by candlelight is no longer considered safe or enjoyable, so get yourself a head-torch. Your first underground trips will just be short walk-in trips into small mines and cave systems. If you’re doing things right, you’ll be being guided by and experienced individual who knows the venue and has the necessary aspects of safety covered, such as what to do in an emergency. Despite the simplicity of these trips, one thing is obvious – it’s going to be dark! And so will every undergrounds trip you ever do.
There’s no need to rush out and get a Scurion head torch (considered by many the best head torches in the world) just yet. You may own a hiking head torch, which may get you by on your first few trips to see if the sport is for you. It won’t be long before you start to realise just how little light a typical hiking head-torch provides. So, If you don’t already have something suitable, or are looking for an instant upgrade, try something such as the Petzl Pixa 2.
Petzl Head Torches
This is a hardy little unit that gives the user 80 lumens of light, and has two different brightness settings. One advantage is that is it powered by two AA batteries, which are readily available. A disadvantage of the Pixa 2 is that it is powered by two AA batteries! So, it depends on user preference, but you will either get through a lot of batteries, or probably you’ll have rechargeable batteries that have to be removed after the torch’s use.
The Pixa 2 is the lamp that we provide for all of our guests on our mine tours in Cornwall.
For approximately double the price, you can get something significantly more powerful. Remember, your head torch is one of the most important components in your caving arsenal. If you can afford it, I’d highly recommend ‘buying once’ i.e., pay a little more for something of higher quality that will hopefully last many years.

Fenix Head Torches
Fenix have carved a respectable niche for themselves in the caving and mine exploration world. They produce a range of lights that, for their size, weight, and price, perform exceptionally well.
I currently use the Fenix HL60R, in fact mine is maybe 5 years old. It’s not the best or brightest in the world, but it still works as well as the day I bought it. That alone is a good endorsement of the quality of Fenix’s torches. The HL60R is still available, but as it is an olde model, it has been replaced by a number of subsequent models.

The HL60R produces 900 lumens of lights (compare that to the Pixa 2’s 80!). However, for a similar price you can get a model such as the Fenix HM65R. This gives a significantly higher output of 1400 lumens.
Most of Fenix’s torches come with an IP waterproof rating of 2m’s, which is adequate for almost all cave and mine trips that don’t involve actual diving. They also feature a number of brightness settings (typically 5), as well as red light setting too.

Helmet for Underground Exploration
Safe underground exploration is built on good habits. Start as you mean to go on, and don’t go underground without wearing an appropriate helmet. Make sure you get a helmet suitable for caving. The helmet needs to be marked with the appropriate ‘EN’ number. EN 12492 is the standard that applies to our sport (as well as rock climbing).
The range of choices is huge, but here are some recommendations.
Petzl Boreo Helmet
Petzl’s most recent helmet, designed for both underground and mountain-related activities. As you get into underground exploration, Petzl is probably a name you will learn to love. Rarely the cheapest option, but the name Peztl is synonymous with quality. They are world-leader is producing equipment for industrial rope access, climbing, and many other sports. But the founder was Fernand Peztl, who was a caver. At a time when no caving kit was available, he simply decided to make his own.

Camp Rockstar Helmet

The Camp Rockstar helmet has been around forever, and remains a popular choice amongst the caving community. For me, it has a slight disadvantage, and that is, out of the box, it is not that easy to attach a head torch to the helmet. It lacks the head torch strap clips that come as standard with many other helmets these days. It does work well with any helmet-fitted torch, but as a beginner, that’s probably not going to be relevant.

Footwear for Mine Exploration and Caving
The humble wellington boot is the weapon of choice for the caver’s feet. Together with the helmet and head torch, these three items for the holy trinity of mine and cave exploration equipment. Again, I can’t think of a scenario when I wouldn’t want at least all three of these things before venturing underground.
Luckily, it is maybe one of the only pieces of equipment not specific to our sport that we use. As a very generic item, there is a huge amount of choice, and the price is so low that there’s really no excuse for not adding a pair of wellies to your immediate shopping list.
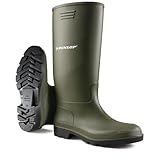
The only choice you need is the Dunlop Pricemastor. A household name, Dunlop’s rubber is as grippy as any you’ll find. In general, once you get used to wellies, you’ll find their grip surprisingly good, and the best choice for scrambling and climbing around in the underground environment.
Armed with your holy trinity of caving equipment, and some old, sacrificial clothes, you’ll now be able to enjoy a range of short, non-technical trips. Indeed, there are many lovers of the sport who are happy at this level, and decide progressing into the more technical realms of caving is not for them. In other words, if you decide not to invest another penny into your mine exploration / caving rig, you still potentially have a lifetime of exploration at your fingertips.
But you want to go further don’t you? Good! The next items on your Christmas list could be one of two things. If you’re happy to stick to more walk-in style trips, but want to do it in more style, then take the red pill.
If you’re keen to add some verticality to your mine and cave trips, then go straight to the blue pill. You’ll eventually have to take both pills, but which order you do so is up to you.
Beware Fake Caving Equipment!
When searching for the items on this list, you’ll very likely come across seemingly appropriate equipment, often at a fraction of the price. Buyer beware! Forgers don’t just make knock-off t-shirts.
They also sell vast amounts of PPE, including ropes, helmets, harnesses, etc., etc. It is not uncommon that they will have printed the relevant EN or CE number on their products. Unfortunately, these are at times total fabrications. They simply have not paid to have their products tested and certified by the relevant bodies.
To avoid these items, that could potentially cause you a fatal injury, I’d recommend sticking to well-known brands (such as Petzl, DMM, Edelrid, Balck Diamond, etc.) and avoid these lesser-known brands altogether. If in doubt, do some online research before buying. It often doesn’t take long before you find online discussions that cast significant doubt over the quality of these cheaper products.
Buying a Caving Oversuit
The red pill is getting yourself some kind of caving oversuit (or caving suit, for short). First and foremost, you’re going to finally look like a real caver, and impress all of your friends. Isn’t that the most important thing?
If you’re looking to keep things budget, you can get yourself a boiler suit, such as this one. But be warned. Whilst it looks superficially just like a caving suit, the similarity ends there. All you have bought is a one piece item of clothing that will save you from using another set of trousers and jumper.
I did use a boiler suit in my early days. It did the job for a while. But once I upgraded to a caving suit, I realised just what an upgrade it was. NO prizes for guessing what I also used said boiler suit for (no, it wasn't collecting guano).


Caving suits aren’t just about looking cool. They provide a range of benefits. Chiefly, they are typically made from some hard-wearing materials that will be much better suited to enduring the brutal underground environment. That means the suit itself is going to last
Secondly, a caving suit will have, depending on its type, some level of water resistance. As the underground environment is nearly always wet to a degree, this is important.
Finally, a good caving suit really helps to keep you warm. Especially when used in conjunction with a properly thought-out layering system underneath.
Aventure Vertical Holloch Caving Suit
Ben and I both wear the Aventure Vertical Holloch caving suit. Ben is on his second (on account of too much crawling through places like Daren Cilau), and we both recommend this suit whole-heartedly.

Warmbac Expedition Oversuit

A slightly cheaper alternative is this capable over suit by Warmbac. A UK brand that I remember best for making wildly fluorescent wetsuits back in the 80s, they now mostly just make gear for underground exploration.
Whilst not as fitted and comfortable as the AV over suits, they do the job very well and are the suits we give to our guests here at Cornwall Underground Adventures.
Caving Suits for Extremely Wet Conditions
If you live in Yorkshire (God forbid), or anywhere that hosts a lot of very wet caves, you may want to go for maximum water resistance and go for a full PVC caving suit.
As a result of the construction material, a PVC over suit isn’t usually the first choice for caving. Offering no breathability whatsoever, if you’re on a relatively dry underground trip, you’ll soon see why this was a mistake, as the interior of your caving suit will be very wet, but the outside will not.
However, if you’re caving in active cave systems with lots of water, and going up, down, or under running water, a PVC caving suit is a no-brainer.


As someone who opted to ‘take the blue pill’ first, I delayed getting a caving suit for far too long. Erroneously thinking a boiler suit was basically the same, I have never looked back since getting my first one. You won’t either.
However, certainly in Cornwall, we know many a seasoned mine explorer, proficient in technical SRT, who have gone their whole caving career without getting themselves a caving suit. Or maybe they’ve just always been on Santa’s naughty list…
Vertical Caving and Mine Exploration: Essential Equipment
Why many bypass the caving suit, is so they can get to the sexy stuff as soon as possible. That is, of course, the verticality. Coming from a rock climbing background, certainly one of the main factors that first got me into mine exploring was the appeal of exploring the vertical underground environment.
A full SRT (Single Rope Technique) rig is needed for an experienced caver to fully explore the underground environment independently. As will be detailed in part II of this blog, there’s quite a lot of kit that makes up an SRT rig, and an associated price tag.
I’ll take this opportunity to stress once again the risks involved with technical underground exploration. The author assumes that when taking your first steps into vertical caving /mine exploration, you will be doing so in the safe hands of an appropriately experienced leader.
As a beginner caver, you can still enjoy dipping your toes into the vertical world with a more minimal equipment set-up, provided you do so under the leadership of an experienced, properly-equipped leader.
Do Your Homework
If you’re like any normal caver or mine explorer (there’s an oxymoron if ever there was one), you’re not content simply to think about caving only when you’re underground. You’ll be devouring books, websites, and blogs (such as this) to learn as much as you can about the topic.
As you venture into more technical caving and mine exploration, some technical knowledge is essential. An indispensable book every underground explorer should own is the Complete Caving Manual by Andy Sparrow.
This one volume tells you almost everything you need to know about caving, and includes lots of great information about ropework and how to carry out various SRT manoeuvres. So, make sure you grab a copy and cue spending evenings in front of the TV practising knots. Or cause exasperation with your loved ones as you try and set up practise abseils from the stair banisters. We’ve all been there (if you’re seriously going to do this, make sure you don’t hurt yourself!).


If the Complete Caving Manual whets your appetite, then also consider grabbing ‘Alpine Caving Techniques: A Complete Guide to Safe and Efficient Caving’. This is an almost exhaustive textbook of caving techniques. It’s a hefty volume, so it should keep you entertained for quite a while.
Both books serve as invaluable resources to have on hand.
Climbing Harness or Full SRT Harness?
An essential piece of kit for any manoeuvres on steep ground is a harness of some kind. If you’re just starting out, a basic climbing harness will do. But, make sure it is a harness that conforms with the EN 12277 standard.
This approach is, unfortunately, a ‘buy twice’ approach. As you gradually upgrade to a full SRT setup, this will become redundant. But if the following gear will keep you going for a year or too, it may make sense. And whilst you save your pennies for your SRT rig, you can gain more experience. This way, when you finally acquire it, you’ll be ready to start learning how to use it.
If you know from the outset that you're 'all-in' and want to get hold of a full SRT set-up straight away, then go to part II of this blog (currently in progress).
‘When the student is ready, the teacher will appear’
Again, the warning about fake kit applies, but a simple, slimmed-down harness is what you’re looking for. A full-blown rock-climbing harness with lots of gear loops gives no advantage underground. The gear loops will soon get worn and break off. They can also get caught on edges and really impede progress on tight squeezes.
If you have full Petzl-mania by this stage (which is likely), you won’t go wrong with their Gym Harness.

Cowstails for Cave and Mine Exploration
The final part of your proto-vertical caving setup will be a set of cow’s tails. If cow’s tails were on their fronts, and consisted of a metal carabiner on the end, they would look exactly like this, hence the name.
Cowstails are usually a pair of lanyards that attach to the harness. Each lanyard has a carabiner at the end, allowing the wearer to safely attach themselves to bolts, ropes, or other carabiners. At least one of the carabiners should be some type of locking carabiner. For more about carabiners, see part two of this guide.
You’ll need a set of cowstails to be able to safely attach to pitch heads, as well as safely negotiate traverse lines. Note that cowstails are considered adequate safety to cross an already-rigged traverse line. They are not considered best practice for the rigging and de-rigging of traverse lines. But that’s a story for another day.
The lanyard part of the cowstail is usually made from a length of dynamic rope. Your more experienced caving friend may be able to make one for you. Or you can buy them pre-made.
Learning to make your own cowstails is a useful skill that any proficient caver should be able to do. But, in the first instance seek the help of more experienced cavers to make sure you are tieing the knots safely and correctly. As well as a length of dynamic rope, you will need two carabiners as your attachment mechanisms. The BCA recommends that at least one of these should be some kind of locking carabiner. But, it's easier to just have both of them as lockers. We use the Petzl Vertigo Wire Lock carabiners for all of our cowstails.


Abseil Device for Cave and Mine Exploration
You may still not be ready to commit to a full SRT setup, but that doesn’t mean you can’t get some experience abseiling at this stage.
However, please heed the following tips before you start abseiling.
- It doesn’t matter how many times you’ve read Alpine Caving Techniques, learn to abseil in the presence of an inexperienced, and preferably qualified, individual who can guide you through the process and correct any mistakes you make. In addition, if they’re not using and additional safety rope to back you up during this process, they are probably not sufficiently experienced to be teaching you how to abseil.
- Choose a suitable venue. The author assumes that you don’t have the equipment or skills to climb back up the rope at this stage. Therefore, choose a pitch that allows you a simple walk-out back to the surface. Choosing pitches such as this mean that you can get plenty of abseil practice in before you begin to learn about prusiking up the rope.
There is a staggering array of abseil devices on the market these days. They serve a wide variety of niches, and many boast unique features. Some of these features are useful, and some of them are maybe just gimmicks.
The unique underground environment makes most of these devices unsuitable for use in caving or mine exploration. Specifically, we need an abseil device that can cope well with wet, muddy, and gritty ropes. One device has emerged, above all others, and is almost the sole choice of the modern caver.
The Petzl Stop
There is only one realistic choice for the modern caver. The Petzl Stop. It has passed the test of time, and a relatively recent additional of a braking handle removed any niggling doubts the caving community may have had about its safe performance.

It performs perfectly in the rigours of underground exploration, so you can tackle any pitch knowing you have the right tool for the job. Also, almost every other caver or mine explorer you meet will be using a Petzl Stop. Therefore, if you have any questions or problems, someone on your expedition will likely know the answer.
Also, if you happen to be doing anything wrong (for example rigging it backwards), as it is familiar to all, there’s a much better chance of one of your peers noticing and pointing it out. If you’re using an obscure device that know one else is familiar with, you don’t have that back-up.
Braking Carabiner
Safe use of a Petzl stops involves incorporating a braking carabiner in the system, This needn’t be anything flash, indeed a large HMS carabiner will definitely hinder your abseiling progress. If you want to go for a bombproof option that will last you years, get a steel carabiner. However, any standard snap-gate (EN 12275) carabiner will do, such as this DMM Phantom wire gate.

Essential Safety Gear for Caving and Mine Exploring
This article has been written with the assumption that you are new to caving. As a result, you’re probably going underground as part of a group at this stage, being led by other, more experienced cave and mine explorers.
Therefore, being responsible for the overall safety of the group has probably not befallen you yet. However, once you have acquired enough experience, you are going to want to start going underground with fellow cavers at a similar level of experience to yourself.
That is absolutely fine, and a natural progression in any underground explorer’s journey. However, please heed the following (hopefully obvious) points. Firstly, only choose objectives that are well within the level of the entire group. Also, make sure you follow the basic protocols for safe underground exploration.
That includes having a call-out system in place, so that someone know where you are and knows how to raise the alarm if you don’t emerge by the agreed time. Part of safe underground exploration is to carry some basic safety equipment.
As ever, you hope you never need to use it. But just a small amount of gear could stop a minor incident becoming an extremely serious one. Also, if you are caving with a more experienced group, but they do not have a good safety protocol, don’t be afraid for calling them out. Hopefully they’ll reassure you, but at the very worst don’t ever let anyone make you feel bad just for wanting to be safe.
If you have the opportunity, we would recommend taking some first aid training. Any training is better than nothing and such valuable life skills could be used anywhere, and not just underground.
The safety equipment needs only to be small, and can be carried in a small drybag or waterproof container (such as a Daren drum). It should consist of the following.
- A first-aid kit. Check it is well equipped and the items within are in date
- A small group shelter
- A spare head torch and batteries
- Some candles, or tea lights, etc.
- A lighter.
- Some kind of bag or container to carry them in.
- Make sure at least one person in your group is carrying a mobile phone.


Second-hand Caving Equipment
Beware second-hand caving equipment. The general advice from the caving and climbing community is to avoid acquiring and using used gear. The simple fact is, if you don’t know an item’s history, it may have sustained damage that may not be obvious, or may have been stored in a way that has compromised its safety.
The bottom line is that any life-critical component of your equipment is not worth taking the risk over. So yes, if you want, feel free to use second-hand wellies! Most other things however, wait until you can buy them new.
I hope Part 1 of this complete guide to buying caving and mine exploration equipment has been useful. In the next section we’ll be looking specifically at equipment for SRT. That’s where things get really fun!
Finally, we’ll take a look at a whole range of accessories that you may want to consider. Whether they add some simple comfort to make long trips more enjoyable, allow you to achieve more technical objectives, or simply make your friend jealous, we’ve got you covered!


